|
For information on creating your own email processing form using PHP - see our swiftmailer information page
(This page is intended for operators of Unix & Windows websites hosted at Precisium and so is not applicable to a general audience)
INTRODUCTION:
This form sends an email containing the names of the textboxes(i.e fields)
and the data the user filled in.
The mail message will contain data like the
following:
fromname: owner of this webpub.net webpage
fromaddress:dont-mail-from-this-address@webpub.net
recipient:
dont-mail-to-this-address@webpub.net
subject:
WEBPAGE GENERATED MAIL
field1: this is the what the user typed in the first
text box
field2: 2nd text box
field3: 3rd text box
field4: 4th text
box
HOW TO:
Under your "www" directory there is another directory called "formmail".
(if this folder is no longer present - please contact support@precisium.com.au to have it re-created)
The .htm files in here can be modified to suit your
site.
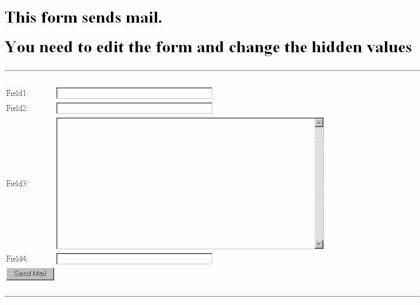
The webform that your web customers will fill out is named
"frmSendMail.htm"
It is very plain to begin with, and looks like
so:
The html for the form contains some hidden fields that are needed by the mail
system to process the form.
<input type="hidden" name="_accountid" value="guest"></input>
<input type="hidden" name="fromname" value="owner of this webpub.net webpage"></input>
<input type="hidden" name="fromaddress" value="dont-mail-from-this-address@webpub.net"></input>
<input type="hidden" name="recipient" value="dont-mail-to-this-address@webpub.net"></input>
<input type="hidden" name="okpage" value="mailsendok.htm"></input>
<input type="hidden" name="failpage" value="mailsendfail.htm"></input>
<input type="hidden" name="subject" value="WEBPAGE GENERATED MAIL"></input>
<input type="hidden" name="replytofield" value="field name for email address"></input>
<input type="hidden" name="showfields" value="true or false"></input>
<input type="hidden" name="ignoremissingfields" value="true or false"></input>
You should not change the names above, but you should change the values (ie change only the parts highlighted in orange above).
e.g.you might change the above lines to read:
<input type="hidden" name="fromname" value="My Inquiry Page"></input>
<input type="hidden" name="fromaddress" value="webinquiryform@myname.on.webpub.net"</input>
<input type="hidden" name="recipient" value="address-to-collect-data@myname.on.webpub.net"></input>
<input type="hidden" name="subject" value="INQUIRY FROM WEB PAGE"></input>
<input type="hidden" name="replytofield" value="txtEmail"></input>
You may modify the names of your non-hidden elements in the form so that they are more meaningful than just 'field1', 'field2'
etc.
If all goes well, your web user will arrive at 'okpage'
Otherwise.. If a problem was encountered they will arrive at the 'failpage'.
You can
customise these files to suit your site.
The "showfields" field controls whether the recipient sees the values of the fields the website visitor supplied in the form, as a list at the bottom of the email.
If you set "showields" to false (it is true by default) you need a 'template' to display the values filled in by the user.
If showfields is false and the template is left out, then showfields will be ignored (i.e. equivalent to setting showfields = true.)
To specify the order in which the fields are listed in
the resulting email, include a line of the following form:
<input type="hidden" name="sort" value="fieldname1,fieldname2,fieldname3"></input>
If you specify a template with field name placeholders in it and a field is not posted to the formmail script (e.g. an unticked checkbox) then the email will contain an error at that point.
The error will look something like "[error: field <fieldname> not found]". This is not a fatal error but simply indicates that the posted form does not contain that particular field.
If you do not want these "errors" to appear in your resultant email then include the configuration field "ignoremissingfields" with a value of "true" (false by default).
To send to multiple recipients, separate the addresses with commas
<input type="hidden" name="recipient" value="dont-mail-to-this-address@webpub.net,dont-mail-to-this-address-either@webpub.net"></input>
User response email:
If you need an email to be sent to the user informing them that the form has been successfully submitted, include this section:
<input type="hidden" name="response_recipientfield" value="field name for email address"></input>
<input type="hidden" name="response_extrarecipient" value="additional_recipient@example.com"></input>
<input type="hidden" name="response_fromname" value="owner of this webpub.net webpage"></input>
<input type="hidden" name="response_fromaddress" value="replace-this-address@webpub.net"></input>
<input type="hidden" name="response_subject" value="WEBPAGE GENERATED MAIL"></input>
<input type="hidden" name="response_showfields" value="true or false"></input>
e.g.
<input type="hidden" name="response_recipientfield" value="txtEmail"></input>
<input type="hidden" name="response_extrarecipient" value="customersupportcopy@example.com"></input>
<input type="hidden" name="response_fromname" value="example.com Enquiry Page"</input>
<input type="hidden" name="response_fromaddress" value="website@example.com"></input>
<input type="hidden" name="response_subject" value="Confirmation of form submission to example.com"></input>
<input type="hidden" name="response_showfields" value="true"></input>
The "response_showfields" field controls whether the user sees the values of the fields they filled in in the form.
The TEMPLATE Feature:
You can add your own text to the resulting email and include placeholders for the information filled out
by the user as shown below.
<input type="hidden" name="template" value="
-----------------------------------------------
[subject]
-----------------------------------------------
Woohoo!
You've received a form-mail from the [fromname] site.
It's from someone/something
going by the name of [name],
and you can probably email them at this address:
[email]
IP Address : [REMOTE_ADDR]
Browser Info: [HTTP_USER_AGENT]
-----------------------------------------------">
Note that the above template is an HTML attribute value spanning multiple lines. You will need to be careful that there are no additional double quotes between the opening and closing quotes.
Alternatively you can use a text file as a template. To use a saved file as the template use the "template" field and put the filename in the value, prefixed with "file:". You need to include the full path to the file relative to the root of your website.
e.g <input type="hidden" name="template" value="file:\formmail\recipient_template.txt">
User response template: Similar to the above template; the value for the field name response_template specifies the template for the email that is sent to the user.
<input type="hidden" name="response_template" value="
---------------------------------------------------------
[response_subject]
---------------------------------------------------------
Woohoo! You've just submitted something to the '[fromname]' site.
This is to confirm your submission.
---------------------------------------------------------">
In addition to the names of fields in your form, some server variables such as REMOTE_ADDR, HTTP_USER_AGENT and HTTP_REFERER can also be used.
The
template is inserted at the top of the email message, and the form fields are
still listed below it.
NOTE: On our UNIX-based hosting plans, you may need to change the 'action' in the <form/> tag like so:
action="/scripts/formmail/"
In future the windows servers will also use this action target.
|
